Forensic use of mount --bind
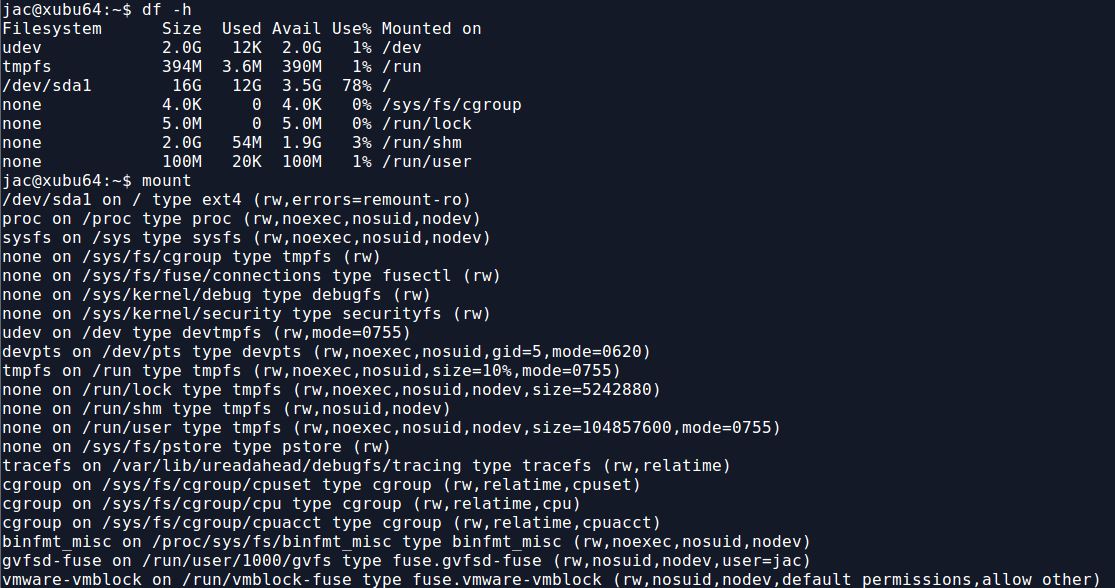
In my previous diary, I mentioned a recent case that led me to write mac-robber.py. In that case, I mentioned that I needed to build a filesystem timeline and wanted to collect hashes because I suspected there were multiple copies of some possible malware scattered around the disk. The biggest issue I had was that hashing the files requires reading them which would update the access times, something I really did not want to do. So, I decided to use a trick on a live system that I had employed occasionally in the past when I got a tar file rather than a disk image of, say, a directory from a SAN or NAS. For those of you who aren't aware, on Linux, you can use the mount command to essentially link a directory to another location in the directory tree. In the screenshot below, you can see the results of df -h and mount on one of my test VMs.
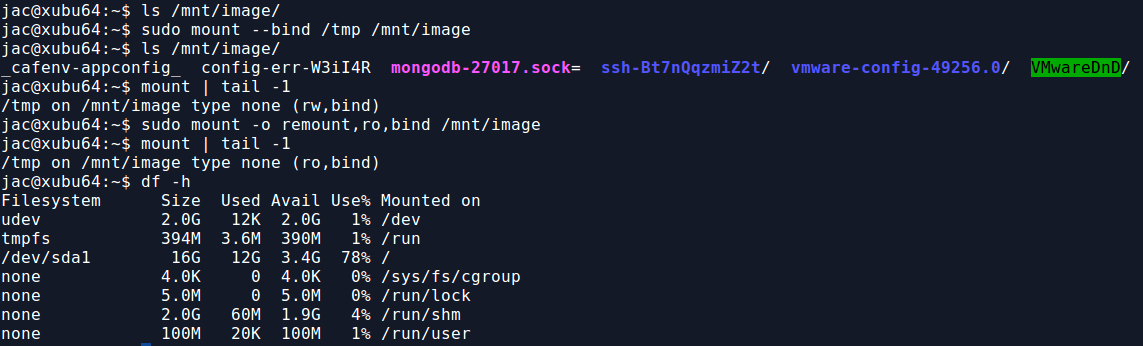
Now, I use the mount --bind command to mount the /tmp directory to /mnt/image. As you can see, there are now contents to /mnt/image, trust me, they match what is in /tmp. Also, from the mount command, you can see that this is currently mounted read-write (rw), for some reason, you can't do -r or -o ro with mount --bind. The second mount command, remounts /mnt/image as read-only (ro). Notice, however, that he bind mount doesn't show up in df -h.
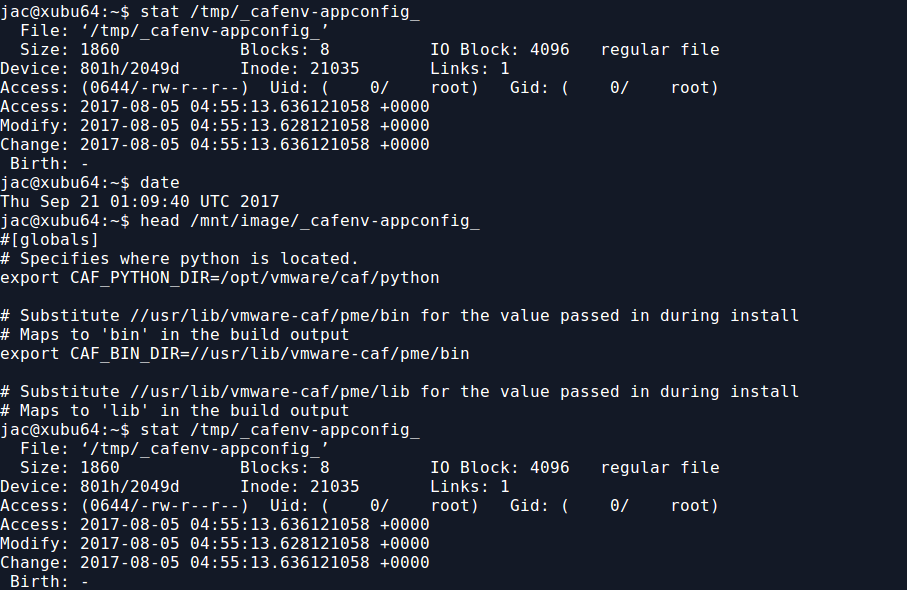
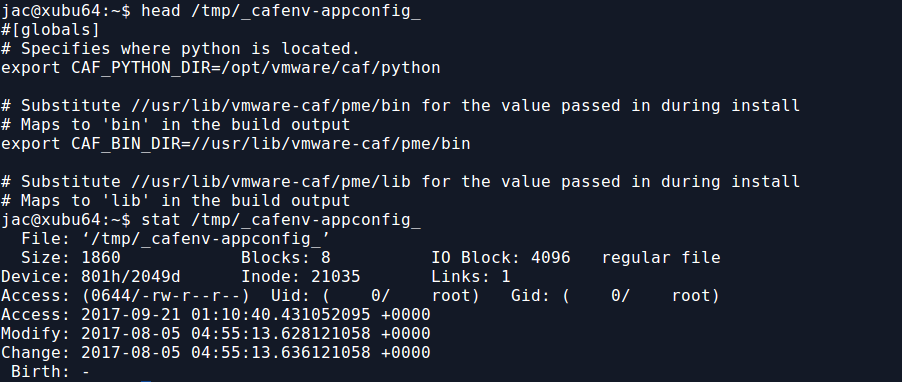
But, now that I have the read-only bind mount, I can read any file there without modifying the access time. As you can see below, if I read the file from /mnt/image, the access time of the original file in /tmp is not modified, but if I read from the file in /tmp, it is.
So, for the recent case I mentioned, I did a bind mount to mount / to /mnt. If you look back up at that first screenshot though, you'll notice that /sys, /proc, and a few other directory trees are actually mounts of various kinds. They will not appear under /mnt unless you do the same trick for each of them. This is kind of a hassle, but can probably be scripted (though I just did it by hand since it was only a handful). I do this because I especially want to get hashes of the exe files under /proc, such as /mnt/proc/1234/exe. This may be the only way to hash a malicious binary as it may no longer exist on the filesystem (and we may not be able to carve deleted files from unallocated space on a live system).
When you are finished, you can use the following one-liner to unmount all the bind mounts. The awk command is used to pluck the mount point, the sort -r sorts them in reverse order so that (in the screenshot below) /mnt/image/sys gets unmounted before /mnt/image.
$ mount | fgrep bind | awk '{print $3}' | sort -r | xargs sudo umount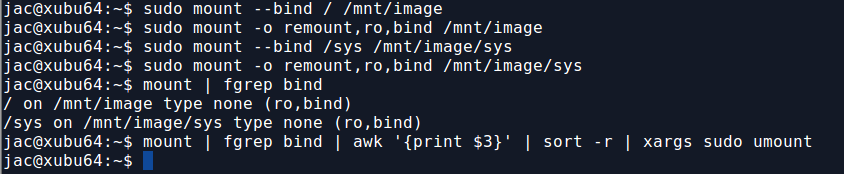
So, there you have it. My trick to use mount --bind to allow you to read files without modifying access times so that you don't mess up your timeline. It really came in handy in that recent live response case. Let me know how it works for you or if you have other suggestions for ways to simplify it. You can leave comments below or via our contact form.
---------------
Jim Clausing, GIAC GSE #26
jclausing --at-- isc [dot] sans (dot) edu
Upcoming Courses Taught By Jim Clausing
| Type | Course / Location | Date |
|---|---|---|
 Community SANS |
Community SANS Ottawa FOR610 Ottawa, ON |
Dec 4, 2017 - Dec 9, 2017 |


Comments